Managing a project from start to finish
In a professional setting, it is pretty rare to manage a project from A to Z, covering everything from conception to communication, including realization. This means overseeing both human and organizational components as well as the technical aspects, along with all forms of communication like graphic design, writing, and even video production. Such an opportunity is more common in an associative context.
Photo management for a non-profit
Section titled “Photo management for a non-profit”A non-profit with a few hundred members from various countries had several thousand photographs scattered across different personal computers. Members responsible for print and web communication complained about their lack of access to these images.
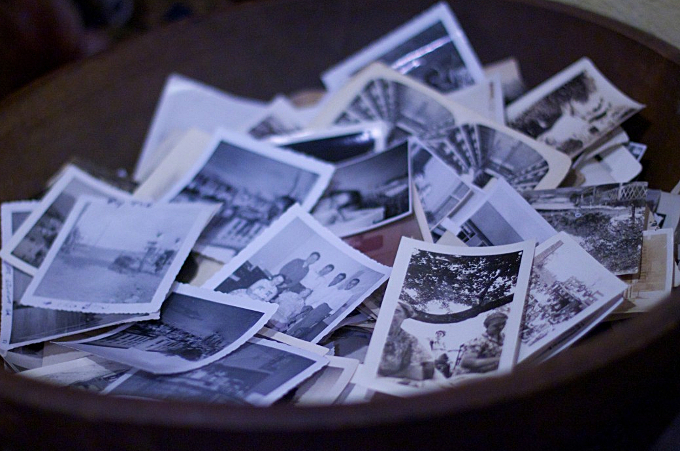
The non-profit collected photos taken by its members at various events in bulk, resulting in a wide array of subjects and formats.
I was tasked with centralizing these photos and facilitating access for the graphic designers. Given my background in photography, poster creation, and setting up discussion forums for the non-profit, I had a clear understanding of the tasks involved. The budget allocated was exactly 0.00 euros.
One of my objectives was to provide users with as much autonomy as possible. Specifically, I wanted photographers to upload photos themselves rather than sending them to me. As the old saying goes, the fewer the links in a chain, the stronger the chain.
Here’s what I did:
- Collected and sorted the photos;
- Set up an online photo gallery;
- Established a backup system;
- Defined a photo management workflow;
- Created video tutorials;
- Produced a multilingual leaflet to explain the solution.
Here is the overall solution diagram:

Everything was developed using Linux.
Retrieving and sorting photos
Section titled “Retrieving and sorting photos”After gathering as many photos as possible, I ended up with over 10,000 photos and 30 GB of data. Quite a load.
Before any automated operations, I made an identical backup copy of all the photos on an external hard drive.
The first task was to identify and delete duplicates using the fdupes command.
I also wanted to ensure no valuable photos were overlooked and sought to find interesting items in this vast collection. Some photos were hidden within zipped directories, while others lacked extensions, for which the file command proved invaluable.
Since the primary goal was to make photos available for print media, I initially sorted the photos automatically according to file size: files smaller than 1 MB were set aside without concern.
Because the files were spread over numerous sub-directories, I used the following command in Bash:

Next, I reviewed approximately 3,000 photos over 1 MB in size using the gThumb viewer, deleting any photos of poor quality or unsuitable subjects for a communication medium. This process took about 3 hours, resulting in 500 photos being retained.
I compared the original photo list with the list of photos larger than 1 MB and copied the eliminated files larger than 1 MB into another directory from the backup, making them available for use on Instagram.
Centralized photo gallery in the cloud
Section titled “Centralized photo gallery in the cloud”With the non-profit’s members spread out geographically, centralized hosting in the cloud was essential.
I had an unused domain name, sufficient free disk space, and databases on my own hosting.
Consequently, I installed an instance of Piwigo, a software I already used for family photos.
Initially, I protected gallery access with a common .htaccess file for all users, later creating personal accounts for the gallery.
Hosting on my personal space is sustainable for a few months, but it would be preferable for the non-profit to own both the hosting and the domain name.
A quick study conducted in September 2018 led me to propose the following solutions:
| Feature | piwigo.com | Obambu Performance | Obambu Evolution |
|---|---|---|---|
| Annual price | €39 | €23 | €15 |
| Unlimited | 250 GB | 100 GB | – |
| Backup | Managed by the host | Managed by the non-profit | – |
| Advantage | Less effort for the non-profit | All files accessible to the non-profit | – |
Photo indexing
Section titled “Photo indexing”Once the 500 selected photos for print projects were uploaded to the site, they needed indexing.
I created around a hundred keywords to best describe each photo. Since it’s not possible to define multilingual keywords in Piwigo, I paired each keyword with a pictogram where possible.
For instance, Vélo fa-bicycle, Intérieur fa-lightbulb, etc.
Incremental and decentralized backup
Section titled “Incremental and decentralized backup”How do we back up the non-profit’s photo assets, i.e., the photos and the Piwigo database, incrementally and in a decentralized manner? I opted for Git with the LFS extension, which efficiently handles binary files.
I first copied the Piwigo server directory to a local disk and initialized a Git LFS repository. I then cloned this repository on GitLab.
This allows any member of the non-profit to create a GitLab account and, after obtaining the password, clone the backup copy.
Under Windows, you can install Git for Windows and GitHub Desktop.
To clone the GitLab repository on a Linux Debian or derivative distribution (including Ubuntu):
-
Request a GitLab invitation.
-
Install the following software:
Terminal window $ sudo apt install git git-lfs -
Clone it:
Terminal window $ git clone https://gitlab.com/repository/communication.gitThe initial cloning process downloads more than 20 GB and can take several hours.
To update your GitLab repository:
-
Navigate to the directory:
Terminal window $ cd communication -
Update the repository and delete obsolete local files:
Terminal window $ git pull --rebase$ git lfs pruneThis operation should be considerably faster than the initial cloning.
For synchronization between the server and my local copy, I used LFTP:
$ lftp ftp://user:password@ftpaccount -e \ "set ftp:ssl-allow no; mirror -e remote-directory \ repertoire-local; quit"Photo hosting is centralized, and backup is decentralized.
Definition of a photo management workflow
Section titled “Definition of a photo management workflow”A technical solution is never sufficient on its own. I thus defined a workflow in which the solution would fit.
Definition of roles for photo workflow members
Section titled “Definition of roles for photo workflow members”The graphic production chain comprises three roles:
- Photographer
- Iconographer
- Graphic Designer
While the same person can alternate between these roles, it is crucial for effective teamwork that these roles remain distinct.
Though the first two roles are familiar to non-profit members, the role of the iconographer is new to many. I queried whether to use this lesser-known term, but concluded I should emphasize it since it is crucial to the project’s long-term success.

Indeed, the non-profit has functioned for years without a photo gallery and can continue to do so, though not optimally. Members will continue to take photos and create posters. However, the gallery’s purpose is to centralize as many photos as possible and facilitate quick access. It will only be used if its indexing is of high quality.
Internal communication
Section titled “Internal communication”With the tools and processes established, all that remained was to engage the stakeholders!
I chose the following communication tools:
- Online explanatory videos;
- A leaflet to be distributed at the non-profit’s various events.
Video tutorials
Section titled “Video tutorials”I posted several tutorials on YouTube in French, English, and Spanish, demonstrating how to use the gallery for different user types.
I used SimpleScreenRecorder for recording. Initially, I tried using my laptop’s built-in microphone, which proved inadequate. Hence, I used a high-quality microphone, specifically a Bird UM1. Pressed for time, and given that these tutorials target a limited (and understanding) audience, I chose not to edit them as I might with Kdenlive.
Paper support
Section titled “Paper support”I created a leaflet that explains:
- How to connect to the gallery;
- The different user types of the tool (emphasizing the iconographers’ role);
- How each user type utilizes the gallery;
- The workflow in which users participate.
Why choose LaTeX to create the print materials instead of a conventional DTP program? I wanted the ability to revise the text without redoing the layout each time. Similarly, I wanted to translate the brochure without engaging in manual DTP work.
Here’s an example of LaTeX code:
\section{faTag Iconographers}
\vspace*{\fill}
\begin{enumerate}[itemsep=0mm,leftmargin=*]
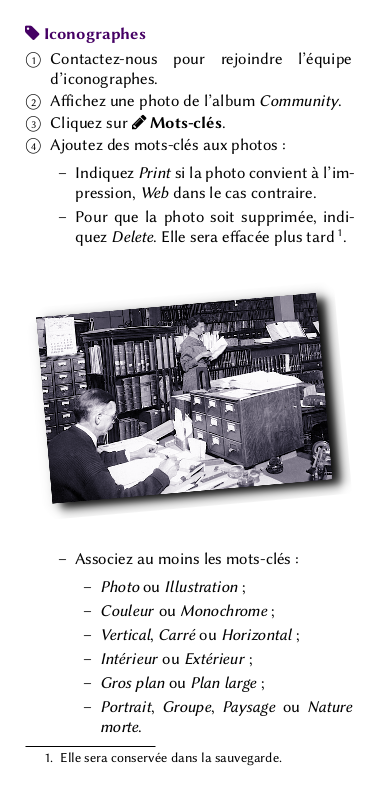
\item Contact us to join our team of iconographers. \item Display a photo from the album \emph{Community}. \item Click on \faPencil \textbf{Keywords}. \Add keywords to photos:
\begin{itemize} \item Indicate \emph{Print} if the photo is suitable for printing, \emph{Web} if not. \item To delete the photo, enter \emph{Delete}. It will be deleted later.\footnote{} \end{itemize}
\end{enumerate}
\begin{center} \setlength{\fboxsep}{0pt}% \setlength{\fboxrule}{0pt}% \fbox{includegraphics[angle=5,width=linewidth]{iconographes}}%\end{center}Below is the PDF rendering. Note the automatic hyphenation calculation (the subject of a doctoral thesis). It’s one of LaTeX’s many advantages.
Once you’ve created your flyer structure, it’s easy to use it to quickly produce other documents. Furthermore, others can rework the document without licensing or software platform concerns.
Track changes with Git
Section titled “Track changes with Git”Tracking changes in Overleaf or Git effectively prevents errors: it’s easy to visualize changes in content or form between versions, revert to a previous version anytime, and maintain multiple versions in parallel.
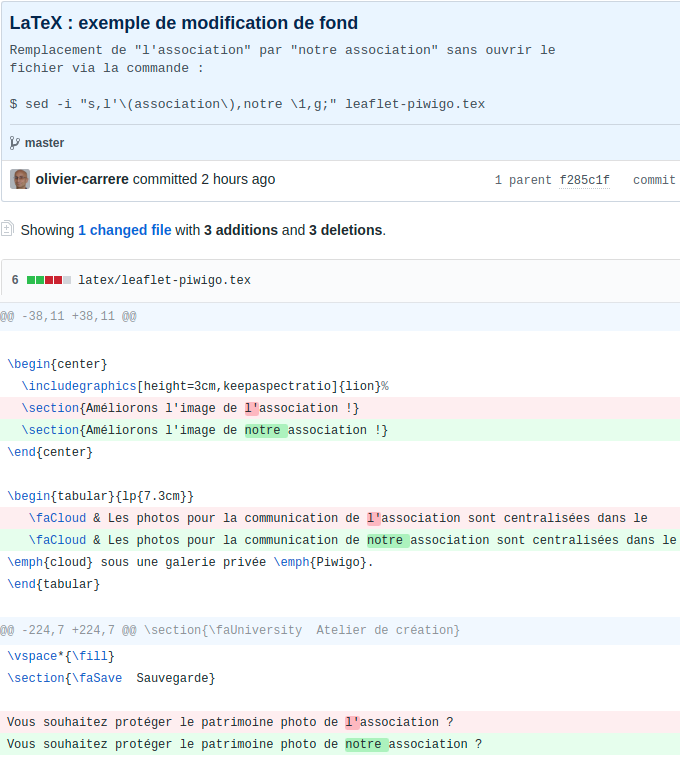 Viewing background changes in GitHub
 View form modifications in GitHub!
Here’s the evolution of an excerpt from the compiled PDF:

You can collaborate on the same project, either synchronously or asynchronously.
Editorial style
Section titled “Editorial style”Given this was an internal communications project, I adopted a relaxed editorial style. However, I was mindful not to overdo the humor. The aim was to ensure comprehension across three languages (French, English, and Spanish).
Iconography
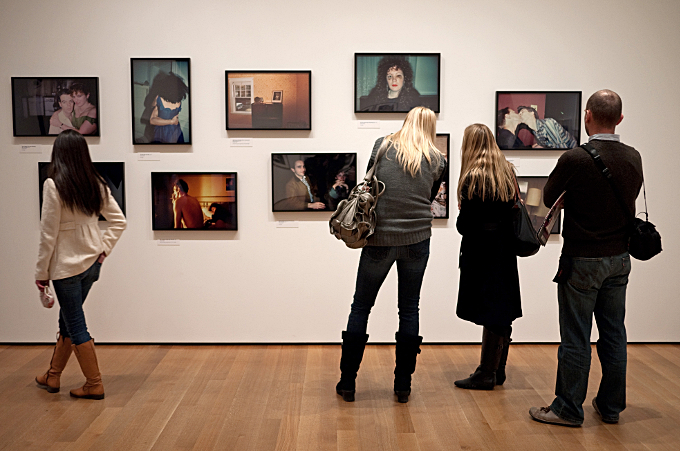
Section titled “Iconography”The choice of iconography proved to be a fascinating stylistic exercise.
First, I practiced the brochure’s principles in its text.
I aimed to convey these messages through iconography:
| Message | Description |
|---|---|
| A Concrete Task | I discovered that I hadn’t invented anything and that the concept of “weeding” was familiar to iconographers. |
| Teamwork | Participation in graphic production is a collaborative effort, not done by isolated individuals. |
After initially selecting images of individuals, I shifted to group photos.
After several trials, I decided to use old photos, either royalty-free or under Creative Commons licenses. Using Gimp, I subtly processed the colors to achieve a more uniform look.
To have fun with these tasks, I played with the quirky side, even if it meant occasionally revisiting certain selections whose humor was too obscure. For example, the following photo, which amused only me, did little to enhance understanding of the Tutorials section:
Patience
Section titled “Patience”Naturally, as every structure inevitably resists change, progression won’t always meet my expectations. The iconographer team I envision may not materialize, and I might be the sole person indexing photos in the gallery.
Nonetheless, I believe my goals are realistic. If even half of the photographers and graphic designers use the gallery to download their photos, I’ll consider the project a success.
But honestly, it’s already a success for me, fueled by the satisfaction of seeing it through to completion…